Leave Module has been implemented mostly as per the guidelines given in ‘IIMB Service Rules Amended as on 2009’ and as per practices followed by IIMB as advised by the Personnel Section. Using this module you can apply / request for leave, cancel the leave that you have requested, return unutilized portion of leave that was requested, view leave balances and view leave history. In addition you can set up a ‘For your Information (FYI) List’ by which you can intimate persons associated with your work about your intention to go on leave.
You can approve leave requests of those who report to you. If you are going to be away from work, you can delegate the approving role to any other employee of your dept, till you return.
The general holidays’ list for the current calendar year is also
provided as a link to enable you to plan your leave
accordingly.
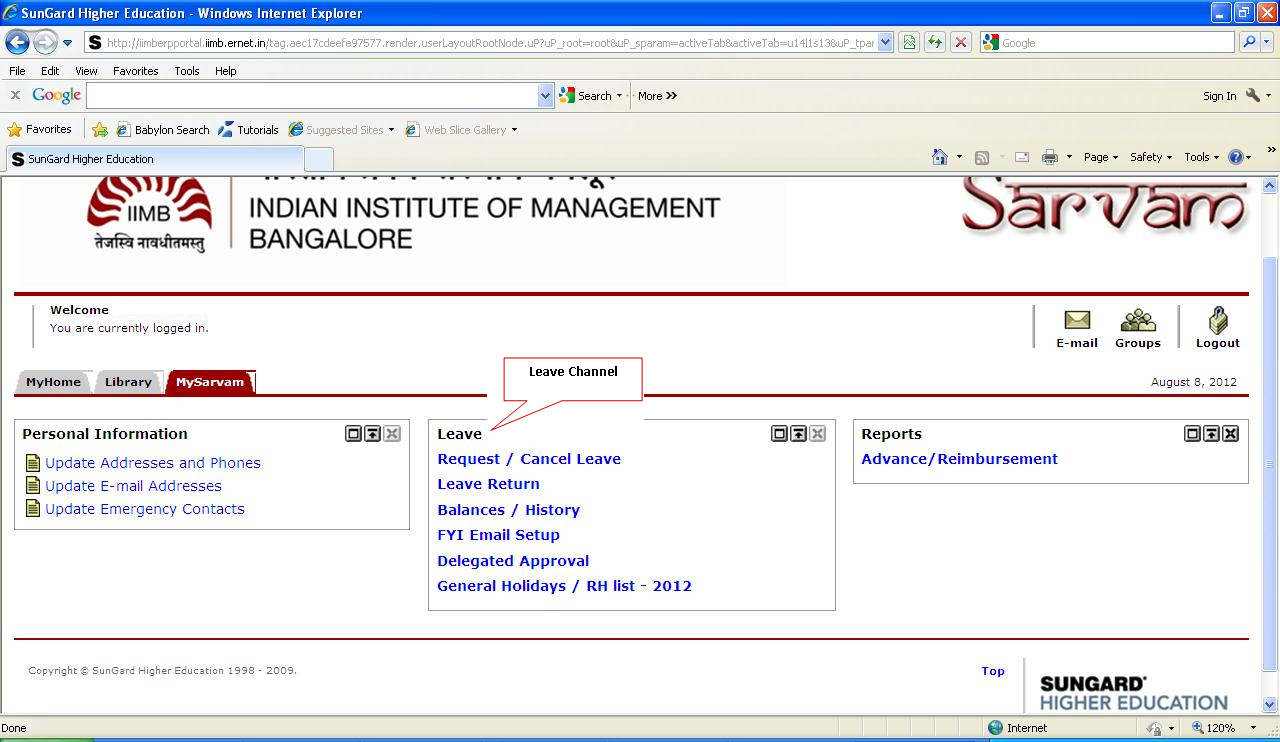
Leave Channel
LeaveTransactions screen
Leave RequestScreen
Leave Cancellation RequestScreen
Leave Return
LeaveHistory
For your Information (FYI)List
Approve Leave
Delegateapproval authority
Screen 1 below gives the Menu as in the ‘Leave Channel’
of Sarvam Portal.
Screen 1 Back to Top
Apply / Request Leave
Leave Transactions screen Back to Top
View your leave transactions. This lists all your leave requests, cancellations and leave returns. You will notice that leave request that has not yet been approved, has a hyperlink on the start date. Clicking on this will take you to the ‘Leave request screen’ with details of this specific leave. You can modify the details if you wish and resubmit.
You can ‘delete a leave request’ that has been ‘saved’ and not yet been ‘Submitted’. Click on <Delete> in the appropriate row of the ‘Cancel / Delete’ column, which is the last column.
You can ‘cancel a leave request’ submitted by you before or after approval by the approving authority. Click on <Cancel> in the appropriate row of the ‘Cancel / Delete’ column, which is the last column. Leave can only be cancelled before its commencement / start date. Later on, if you wish to cancel the leave, it can be ‘Returned’ as unutilized.
Screen 2 below gives the list of Leave Requests screen
Screen 2
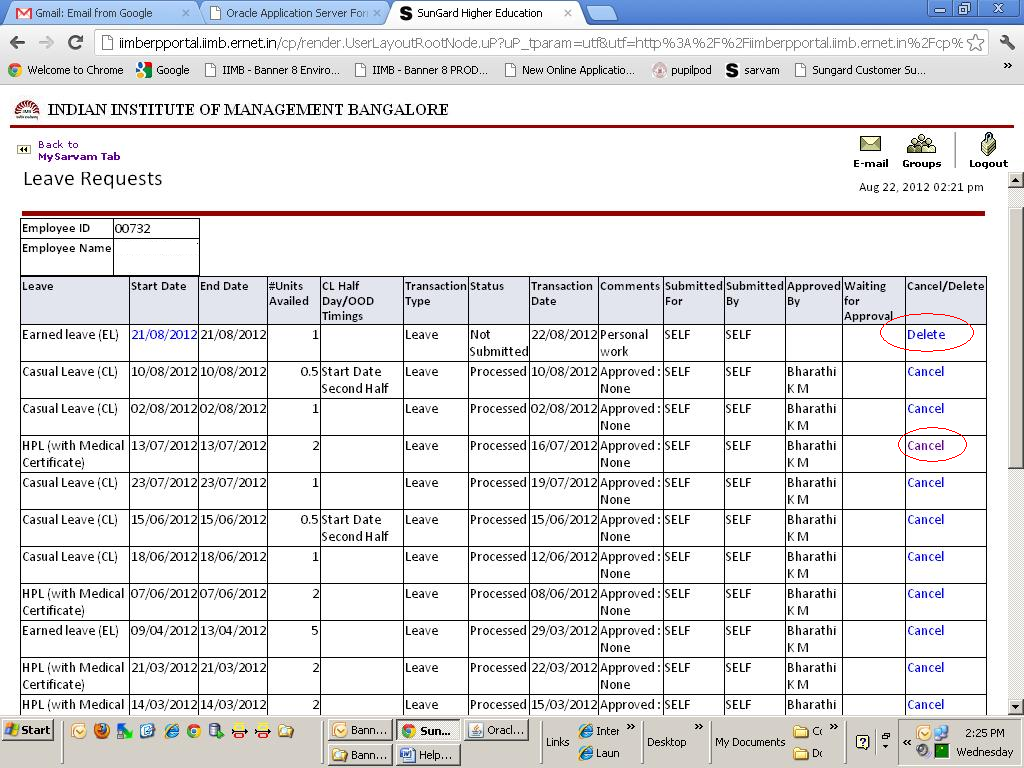
At the end of the screen click on <Apply> button to apply for leave.
Screen 2 (contd.)
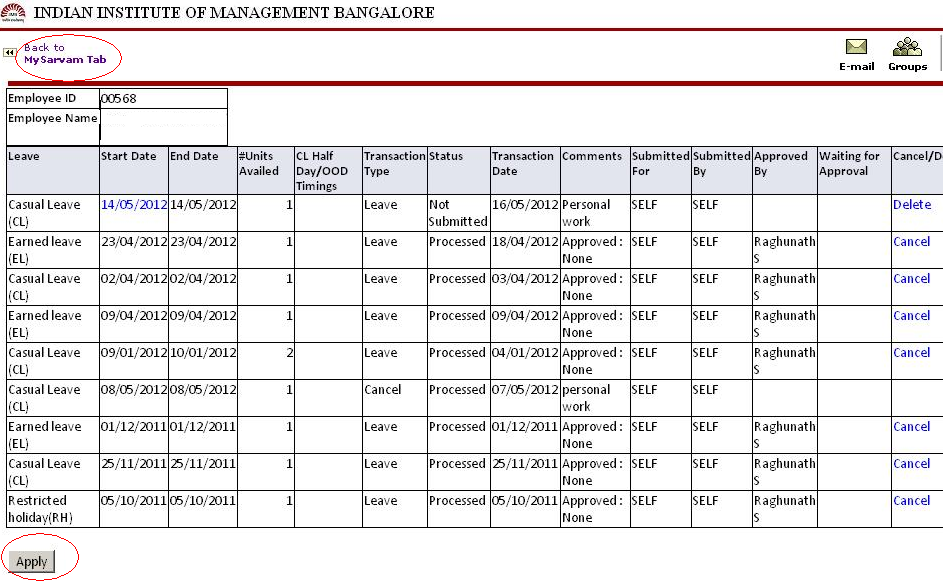
To go back to leave channel click on <My Sarvam tab>
Leave Request Screen Back to Top
Choose the Type of Leave that you wish to avail. Eg: casual leave, earned leave, etc. Specify other details as applicable. Note that ½ day leave is applicable only for casual Leave. Also note that while calculating ‘No of days leave availed’ (units availed) the system considers inclusion / exclusion of intervening holidays, as per rules. Similarly the system does / does not allow combining different types of leave on a contiguous basis, as per rules.
If you are going to be away from the office ‘on official duty’ (OOD) you can choose the same in type of leave. For those employees who are required to mark their attendance, the system will compare their attendance, leave and OOD records and generate an ‘unauthorized absence report’.
Screen 3 below gives the Leave Request form screen
Screen 3
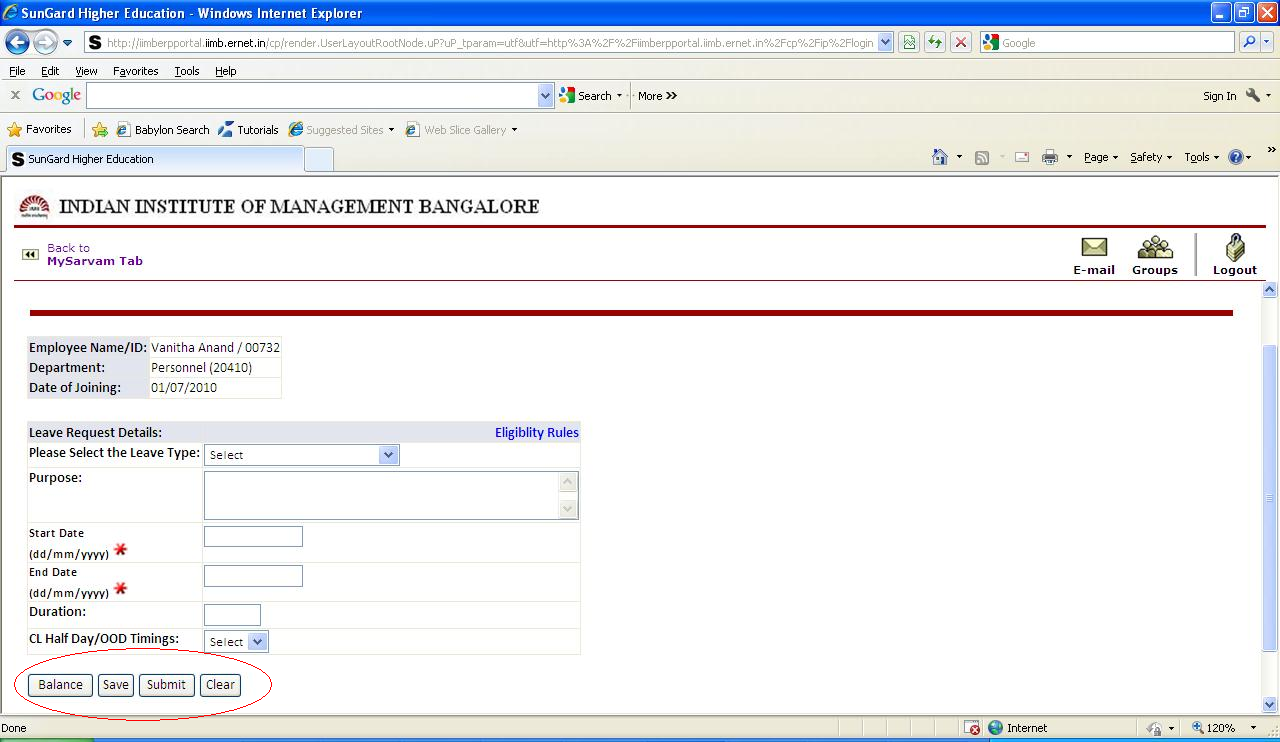
After entering required details for applying leave you can either <save> your request or <submit> your request. Clicking on <Clear> in this screen clears the leave request details that you have entered and takes you back to the ‘Leave Transactions’ screen. The saved request can be submitted by you with / without modification later.
Only on submit, will your leave request go to your ‘approving authority’. She will get an email alert stating that your leave request is awaiting her approval.
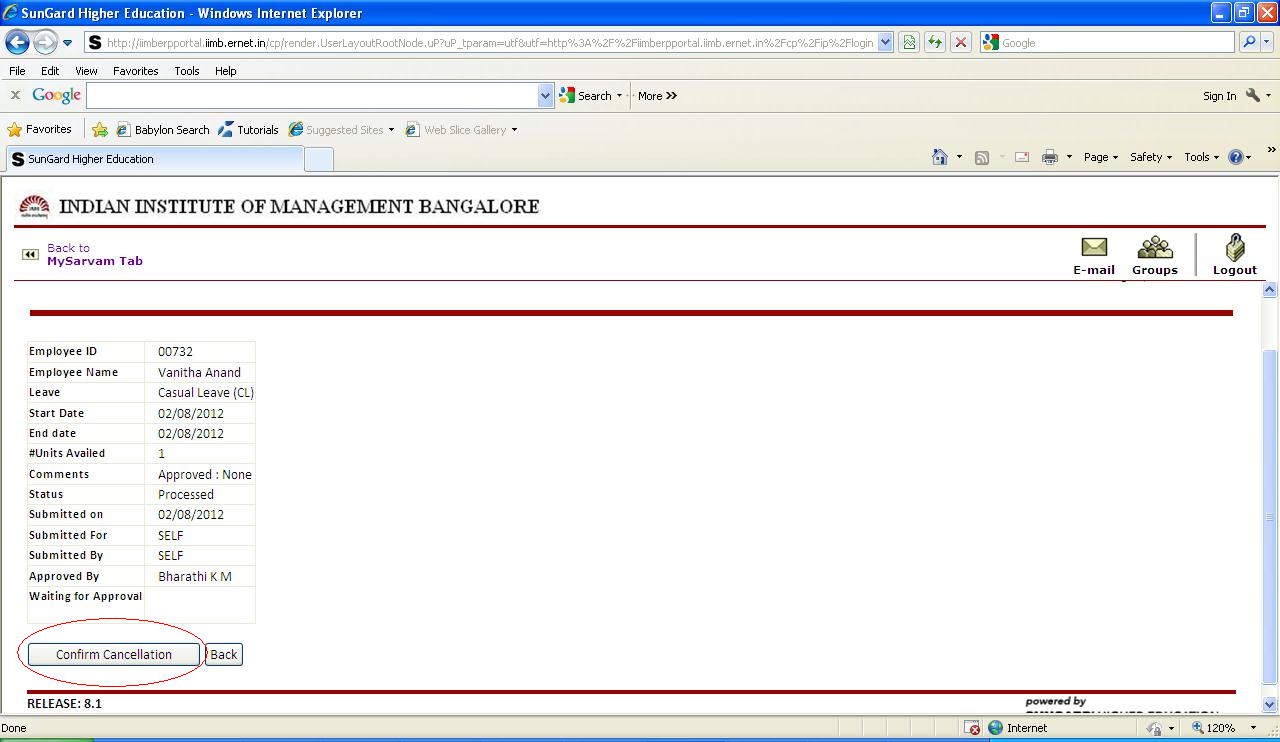
Leave Cancellation Request Screen Back to Top
Leave Cancellation Request screen is displayed when you choose to ‘Cancel’ a leave request on the ‘Leave transactions’ screen. When you click on ‘Confirm Cancellation’ button, your cancellation request will go to your ‘approving authority’. She will get an email alert stating that your cancellation request is awaiting her approval. Please note that Leave can only be cancelled before its commencement / start date
Screen 4 below gives the Leave Cancellation Request screen
Screen 4
Please note that ‘Leave request’, ‘Leave Cancellation’ and ‘Leave Return’ for faculty is self-approved. However, leaves such as EL greater than 30 days, EOL, Sabbatical leave etc. will go to Dean Academic for approval.
If you are not able to apply / request leave beforehand, you can apply / request for leave within 7 days of utilizing the same i.e within 7 days after the leave end-date. Beyond this limit the system disallows your request.
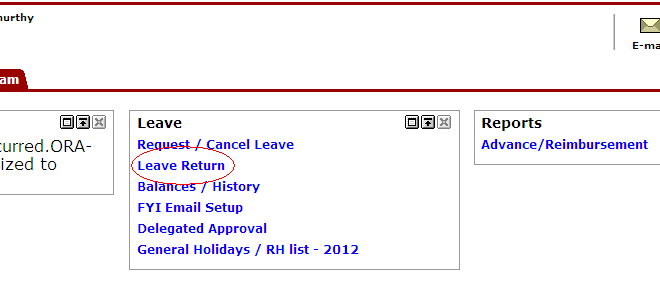
Leave Return Back to Top
You can ‘return’ unutilized portion of your leave that has either been self-approved or approved by the approving authority by clicking on <Leave return> . The returned leave has to be approved by your approving authority before your leave balance is credited again.
Screen 5 below gives the list of your approved leave requests.
Screen 5
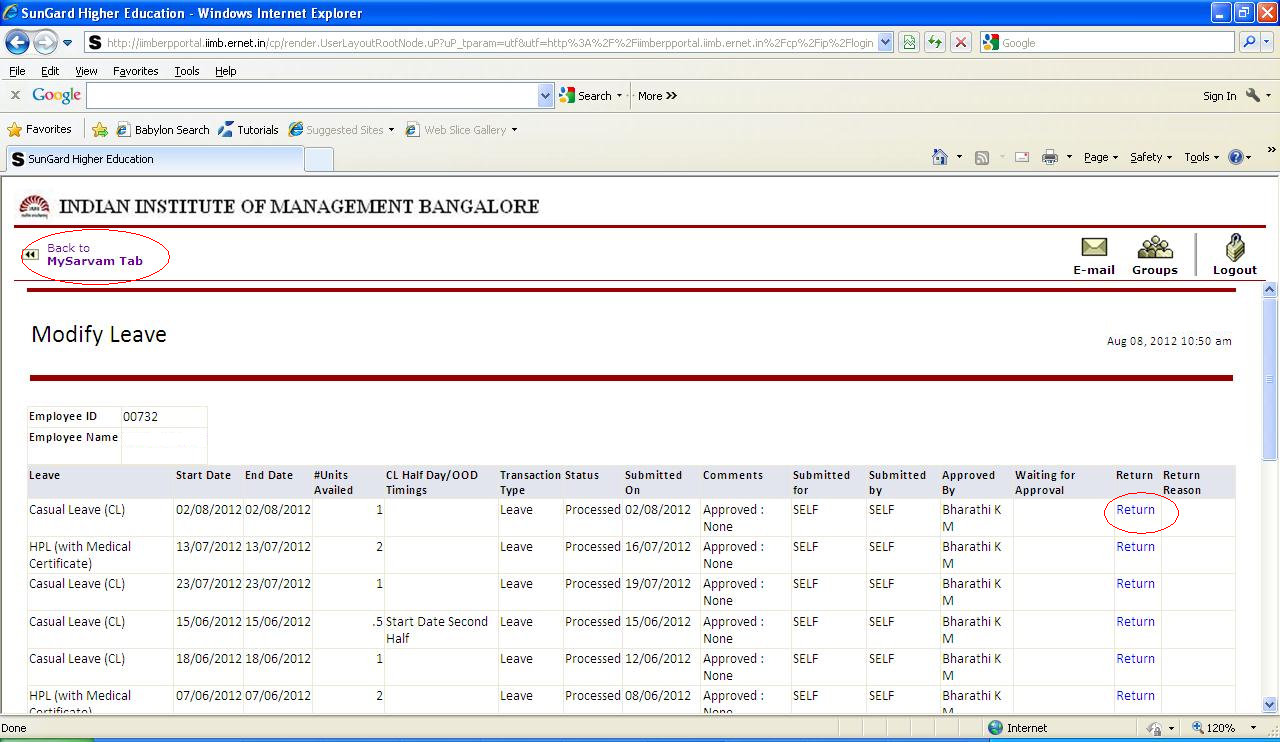
Click on <Return> in the appropriate row of the ‘Return’ column, which is the second column from the right.
Screen 6 below gives the ‘Leave Return’ screen
Screen 6
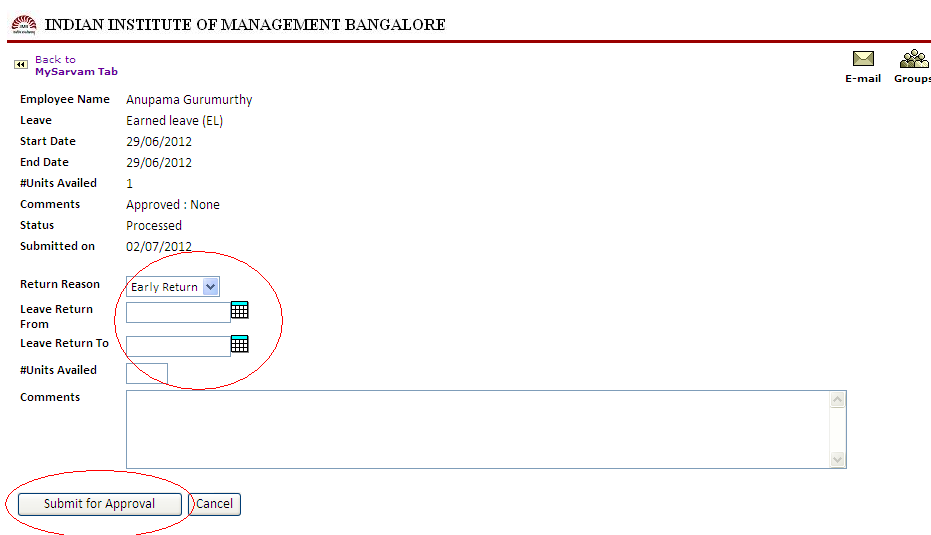
Provide the details of the days of leave that are being returned along with the reason for return.
Once you ‘submit for approval’, will your return request go to your ‘approving authority’. She will get an email alert stating that your leave return request is awaiting her approval.
Please note that ‘faculty leave return ’ is self-approved.
To go back to leave channel click on <My Sarvam tab>
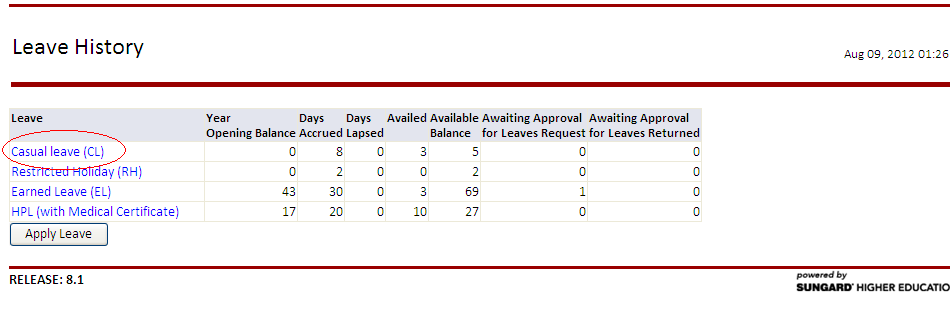
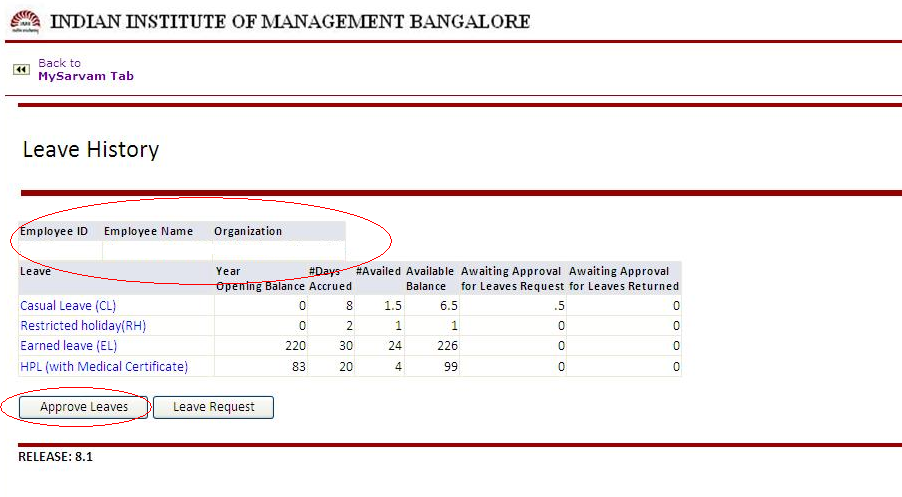
Leave History Back to Top
You can view a summary of your leave record for the various kinds of leave. The summary gives details, such as, opening balance for the calendar year, # days accrued during the year, # days leave availed, balance leave available, Leave requests & returns awaiting approval.
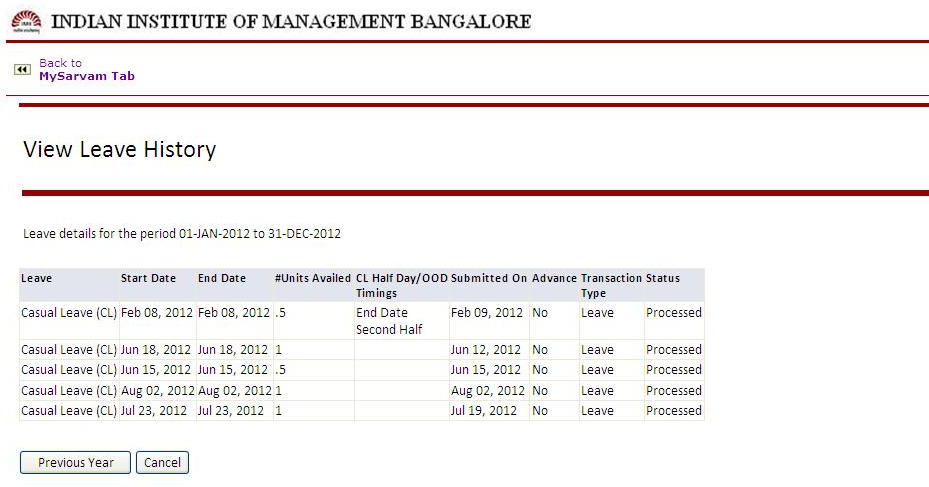
If you click on the leave type hyperlink (for eg. Casual leave (CL) ), you will get a details of all individual leave transactions for the current calendar year.
Screen 7 below gives the Leave History screen
Screen 7
Screen 8 below gives the Leave History details screen
Screen 8
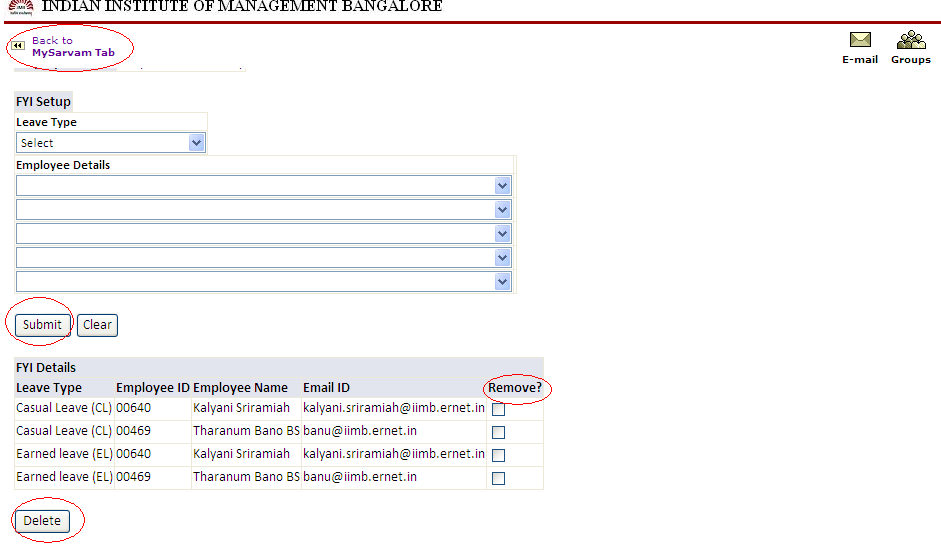
For your Information (FYI) List Back to Top
Using this facility you can intimate persons associated with you at IIMB, about your intention to go on leave. You can set up separate FYI lists for each leave type. You select the leave type and select one or more employees from the list and click <submit>. The system saves this list and displays in the table below. Any time you can remove employees from this list or add more employees to this list. When you apply for a specific leave persons in this list will receive email from the system informing them of the fact.
You can also delete / remove a person from the FYI list. Select the person to be removed. Click on <delete>
Screen 9 below gives the FYI screen
Screen 9
To go back to leave channel click on <My Sarvam tab>
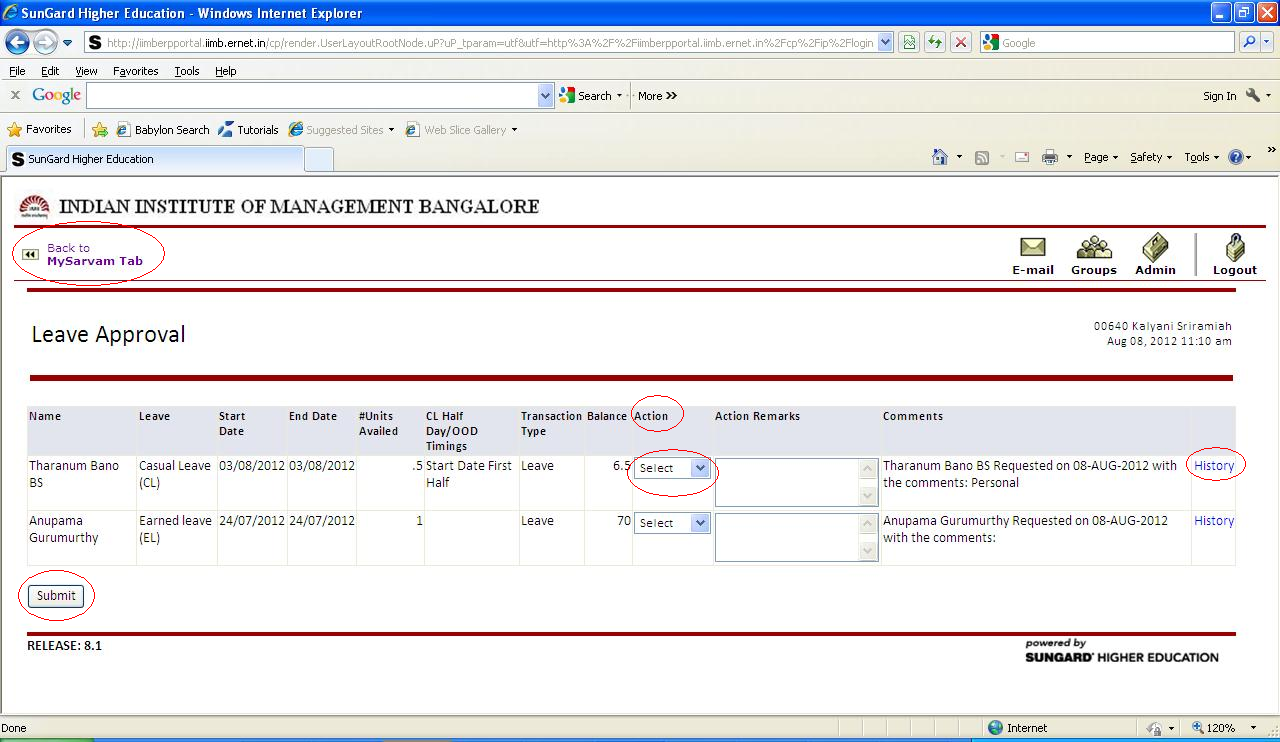
Approve Leave Back to Top
An email will come to you from the system stating that an employee for whom you are the ‘approving authority’ has applied for leave and it is waiting for your approval. In this screen you can either approve / reject the request. You can also enter remarks as appropriate.
Should you want to see the employee leave history before approving / rejecting you may do so by clicking on <history>. After approving / Rejecting click on <submit>
Screen 10 below gives the Leave Approval screen
Screen 10
To go back to leave channel click on <My Sarvam tab>
Screen 11 below gives the Leave History screen of the employee whose leave request you are about to approve / reject. You can go back to Approve leave screen by clicking on <Approve Leave>.
Screen 11
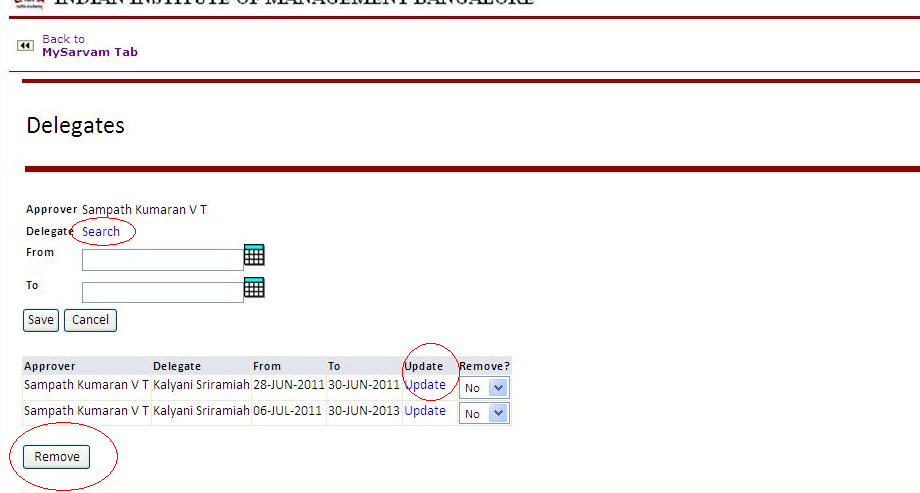
Delegate approval authority Back to Top
If you are going to be away from work, you can delegate the approving role to any other employee of your dept, till you return.
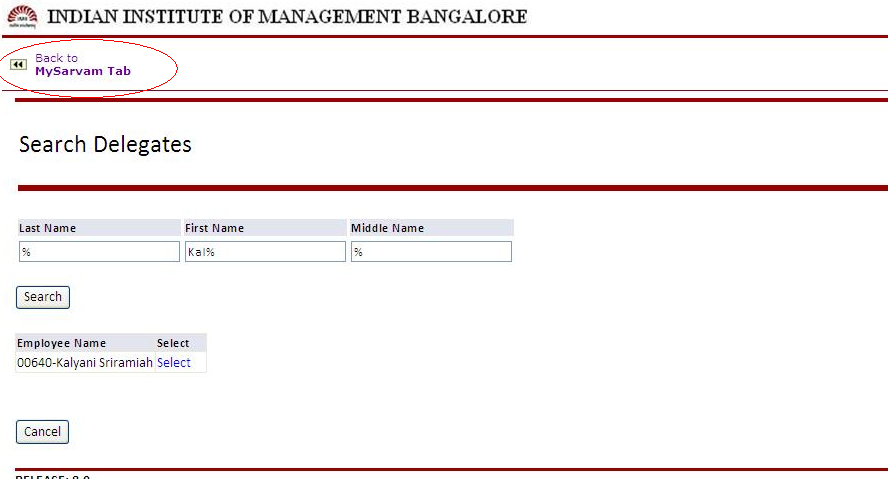
Select for an employee by clicking on <search> and entering few characters of her name, suffixed with ‘%’ character. Select the employee to whom you wish to delegate approval. Enter start & end dates indicating the period of delegation. Save. Details of you delegation will appear at the table below.
You can update the delegation and alter the period by clicking on ‘Update’ hyperlink.
You can also remove the delegated approval authority by selecting ‘Yes’ in the ‘Remove?’ column and then clicking on ‘Remove’ button.
Screen 12 below gives the Delegate Approval screen
Screen 13 below shows the ‘Search Delegates’ screen
Screen 12
Screen 13
To go back to leave channel click on <My Sarvam tab>
Ver 1.0 Page